0

Emphasise Green Eyes ❤️

Hey guys!

So today I decided to emphasise my green eyes and make them a darker more emerald like green shade .

For this look I just went ahead with my everyday foundation routine and then moved on to the exciting part!

IMG_0477

Products:

  1. Naked 3 palette – shades nooner, blackout and limit.
  2. Fuschia palette- a neutral base colour (any will do).
  3. Mascara (again any)
  4. Eyeliner – gel (Fuschia gel pot), shade – chocolate brown.
  5. Eyeliner – (tight line & water line) Mac kohl – feline
  6. Fake eyelahes – (optional)

Application:

  1. So I started of applying the base shade to my eyes with a fluffy blending brush. I took this shade all the way up to the eyebrow.
  2. Next I applied limit -naked 3 palette all over the eye, except the very inner corner as I wanted to keep that area light and bright.
  3. I then took my angled application brush along with nooner – naked 3 palette. I applied this just above my crease.
  4. I then blended this out with a fluffy dome shaped brush.
  5. I then took blackout – naked 3 palette on another application brush. This I applied in the very inner crease.
  6. I blended that out with the same dome shaped brush.
  7. I then applied gel eyeliner to the upper lash line. I applied pencil liner to the tight line and water line.
  8. I completed this look with mascara. I used NYC jumbo lashes mascara .
  9. For a night out or extra glam you could add fake eyelashes, I left it without any as it was a daytime look. 

Hope you enjoyed this look and I’d love to hear from you 🙂 


0

The Bucket List 2015

The Bucket List For 2015 


1. Number one on my bucket list is definitely to grow my hair past my shoulders. I’ve been trying to for years but this year is the first time I think it’s achievable. I’ve stopped dying my hair completely for the first time in fooooevs.

2. Two would be to learn a new skill, I’m thinking yoga/a new language/something practical . The worlds my oyster! 

3. Travel. Travel. Travel.

4. Do one new thing every week. Whether it be reading a new book, going somewhere new or getting my nails done a new colour. Whatevsss.

5. I really really want to go visit Italy this year. Rome possibly!

6. Sort my career goals out…please god let me achieve this.

7. Blog every day, creative juices at the ready.

8. Be active, be healthy, be fit. 

9. Get a summer beach body. This will honestly be the hardest haha

10. Buy a pet of some distinction 

11. Be more spiritual, Id love to learn reki also

12. Be happier.

13. Go for a walk most evenings

14. Learn to drive.

15. Read more. 

And they are my 15 resolutions for 2015. 

Let me know if you have any, or if anything is similar to mine. I’d love to hear from you all.


0

Im A Genie In A Bottle

Dont quite know how the title of this post relates in anyway to what the content actually is… but how and ever ! haha

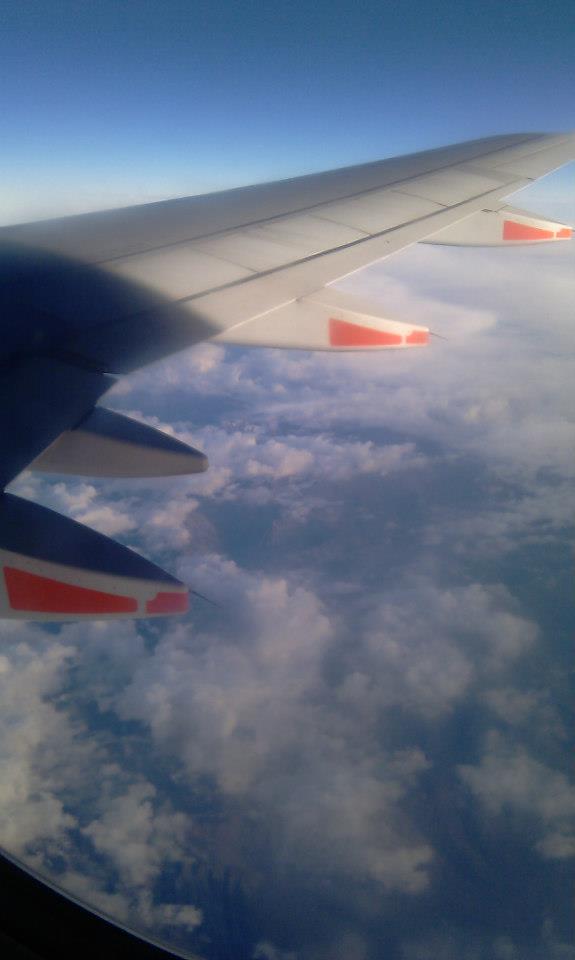
So I thought id share with you an extremely long-overdue post , my travels to ‘The Land Of The Kiwis’ or most commonly known as New Zealand.I left on my journey to this amazing beautiful Island in 2011 and had the privilege of seeing some of the worlds most beautiful sights.

603503_332199906870312_1656547310_n

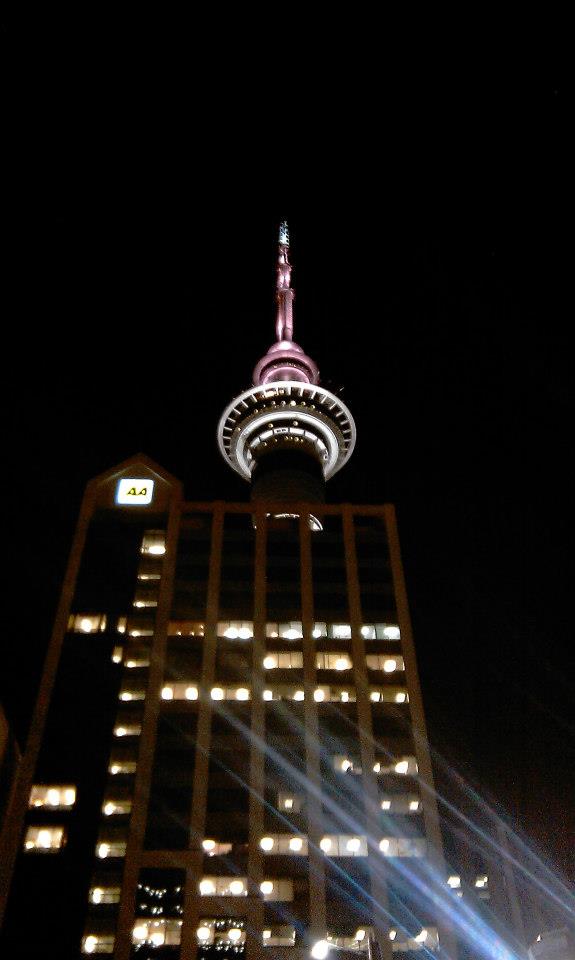
I stayed with a family member for the first part of my travels in Auckland. He lived in the suburbs as they call it out there and it literally resembled something out of ‘Neighbours’. It was so sunny, so colorful and so bright! Being from Ireland (where the sun is a rare great uncle you see once a year drunk at a family wedding) you would automatically be weary of yourself in a place like this, almost expecting some type of serial killing clown to pop out and tell you your really in some sort of twisted evil fun-house! Or maybe thats just my opinion haha… Anyway, Auckland is wonderful, by far it was my favorite of the other citys I visited on this Island. Auckland demonstrates four seasons every day, with the weather changing from roasting, to drizzle-rain, on to cold and finally mediocre wind storms. This is all before 12 noon by the way. Crazy crazy.

The city itself is amaazing, its massive.Theres endless things to do and see. However as Prostitiution is aloweed in New Zealand you would frequently see night walkers on the sides of the streets, which for me put a dampner on the whole city life aspect. A lot of Asians go to New Zealand, particularly Auckland so there are streets you can walk down where you will feel like your in some kind of retro music video with the Asians amazing animé style of fashion. 

There are numerous places to eat out as well, youll never be stuck for lovely food. The beaches in Auckland, although very crowded at times are beautiful. Well worth braving the traffic and crowds!

208324_332199486870354_1202431504_n

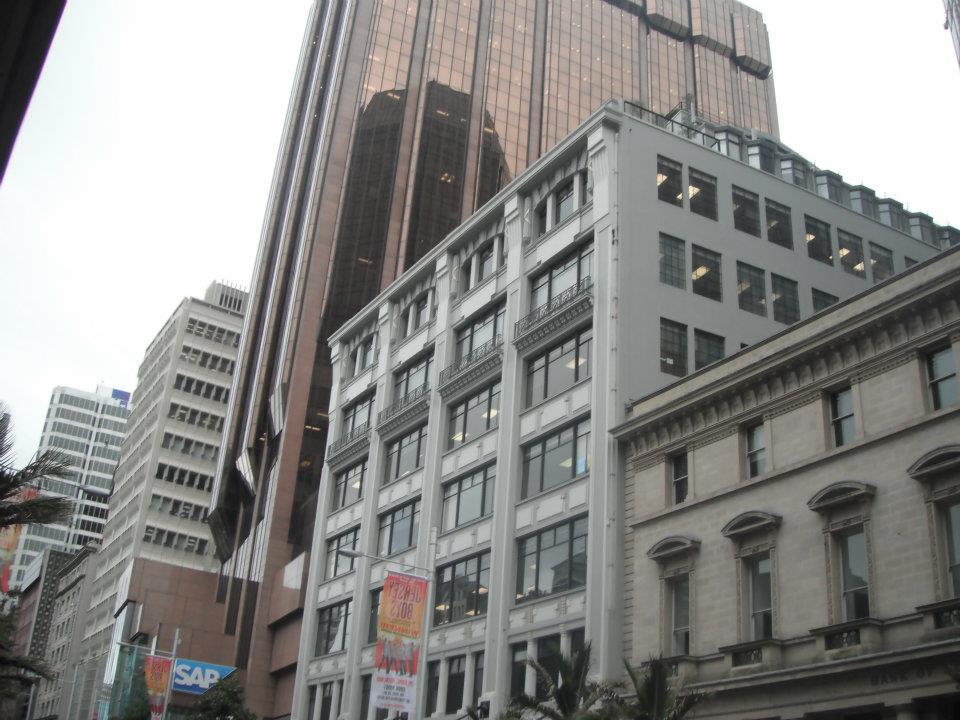
The next destination I went to was Wellington, I didnt see much beauty in it although im sure theres plenty. It was raining the whole time I stayed and the city is very buisness oriantated with massive skyscrapping office block buildings. 

528749_277229199034050_1761774977_n

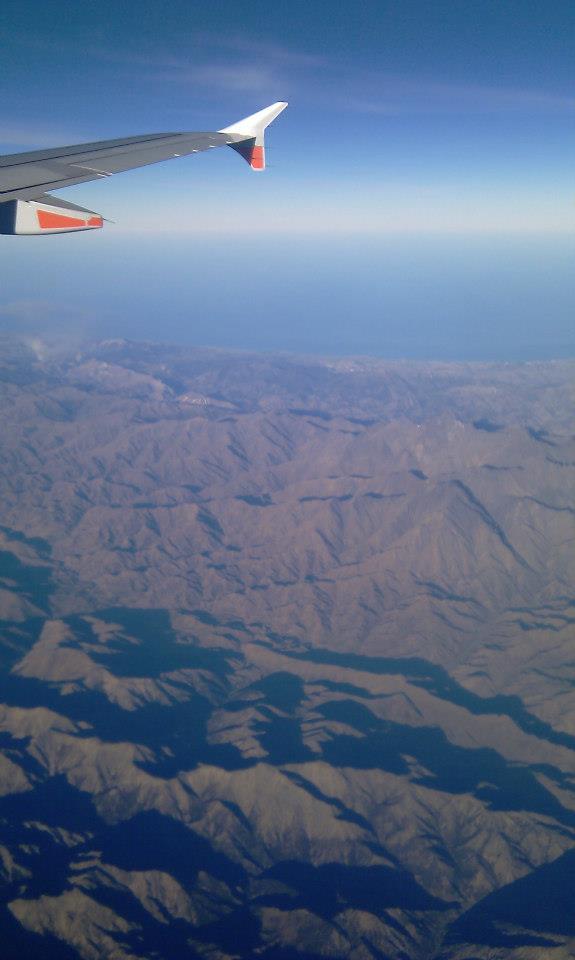
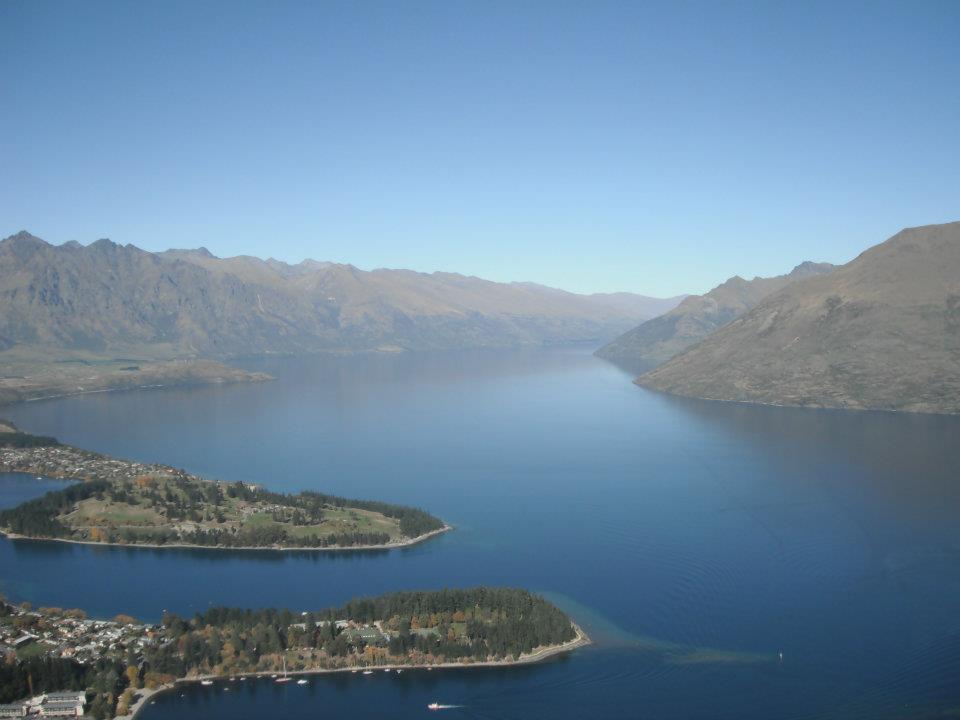
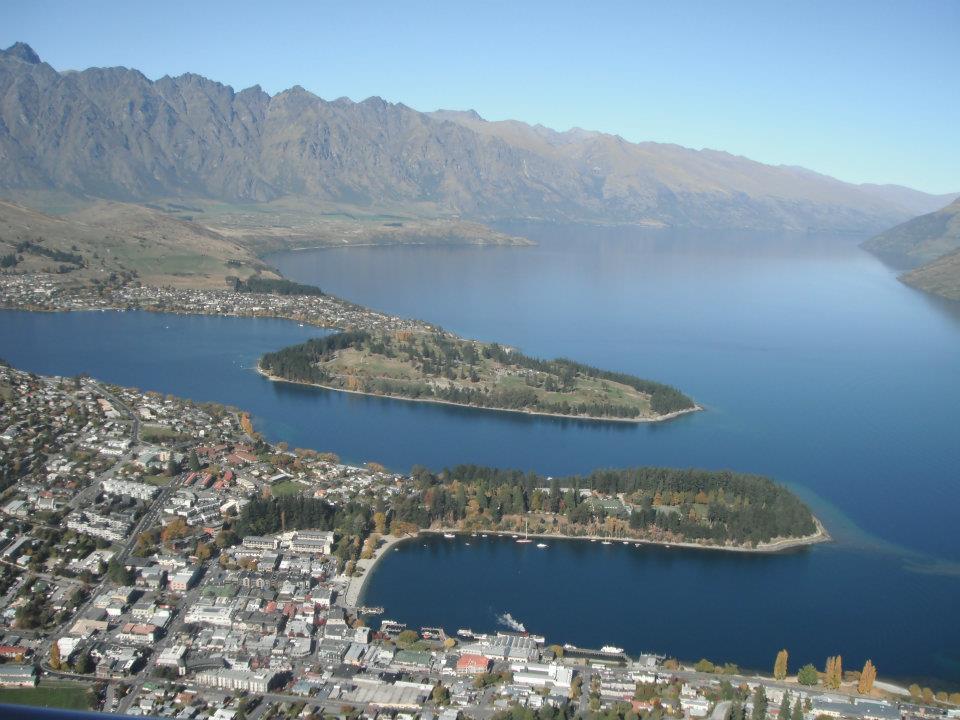
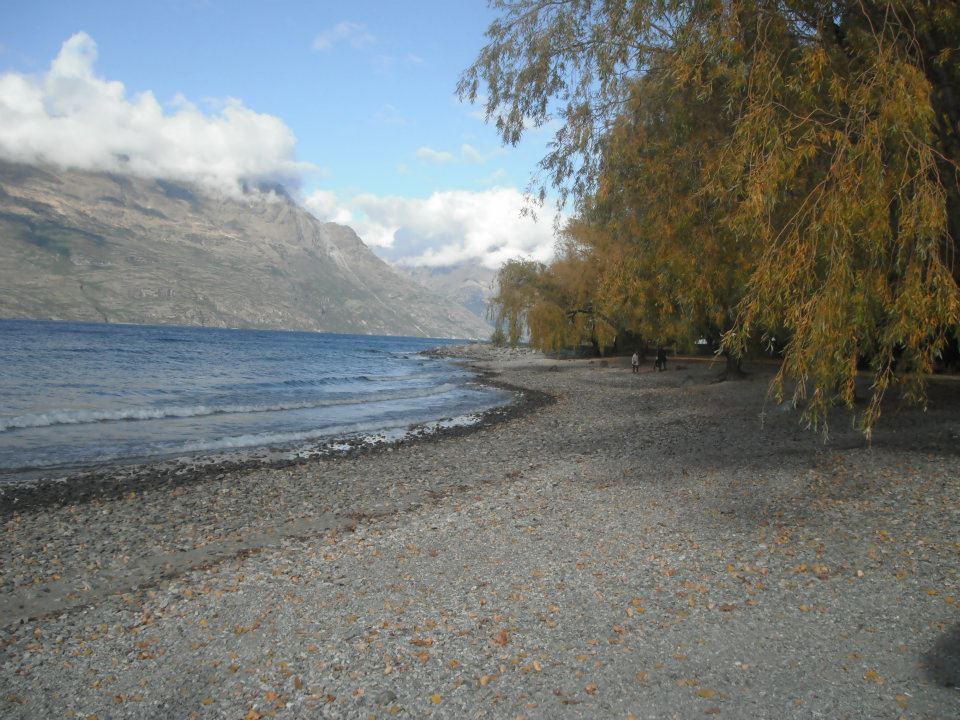
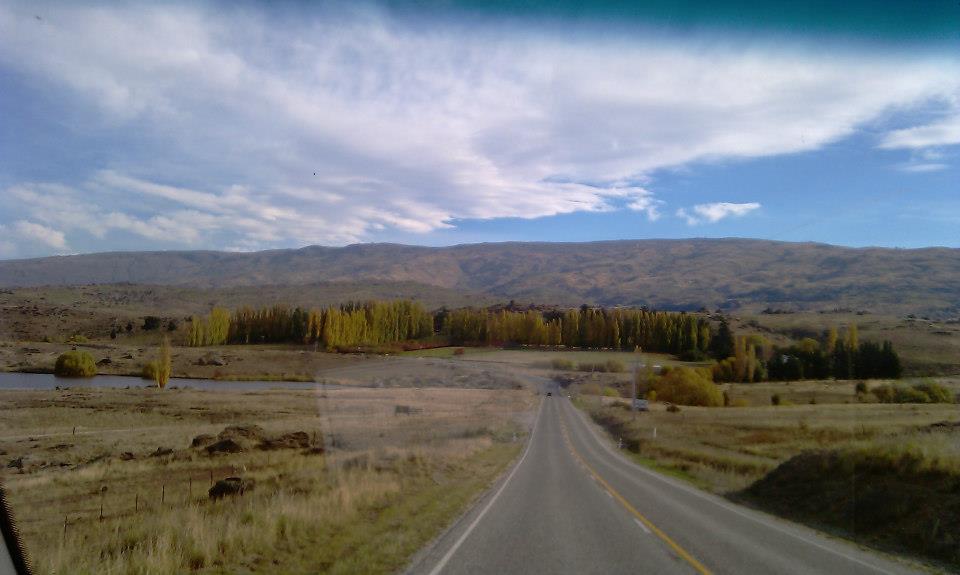
I then moved onto the South Island. I drove through many of the towns and villages on my way to where I needed to go.Here I stayed in Queensland it is honestly the most beautiful place I have ever seen. It is so tourist oriantated and very expensive but it is just gorgeous. If I could have lived anywhere it would have been there.

553473_332204446869858_1857783091_n 535672_277227489034221_2083994098_n 535113_277227769034193_1489495785_n 525673_277227699034200_1279232632_n 306150_277225722367731_603079548_n

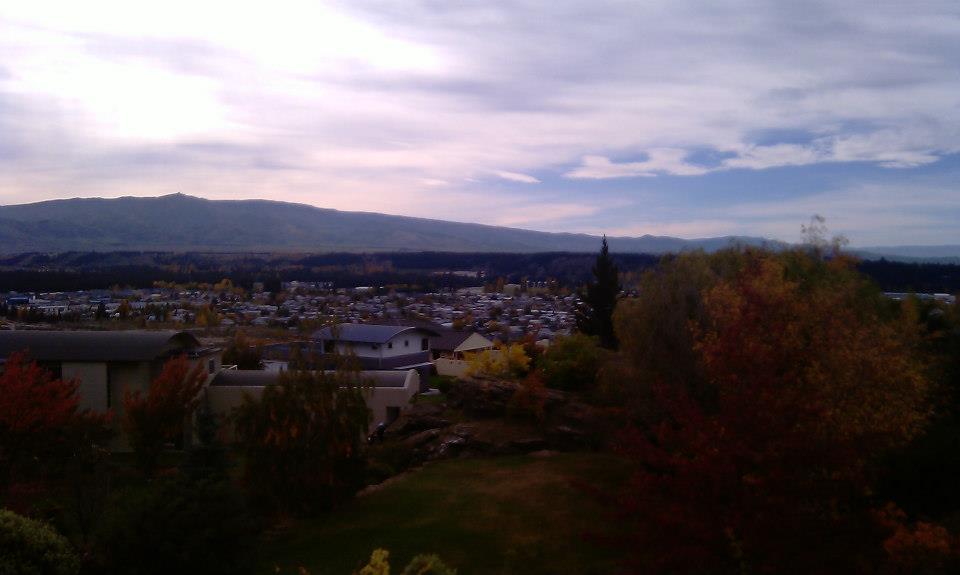
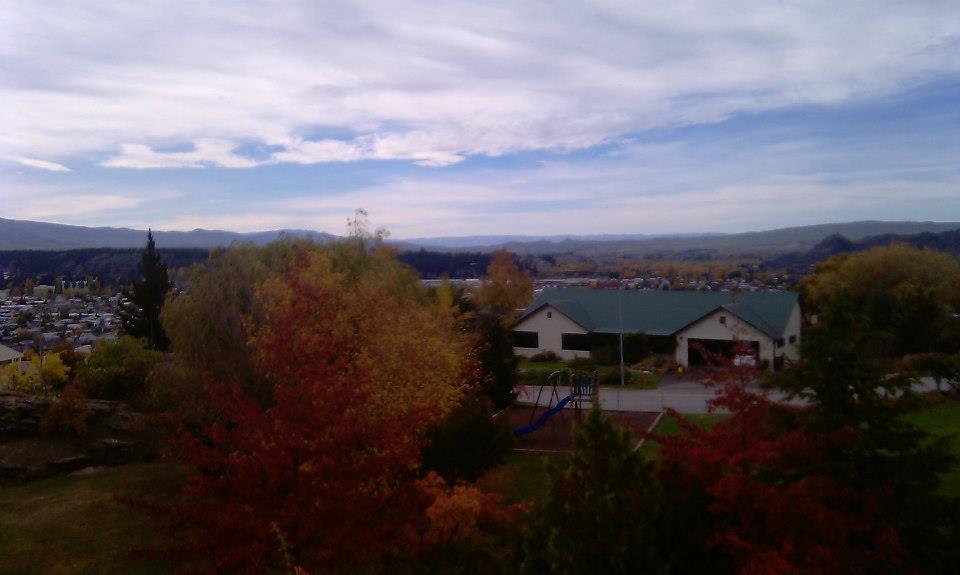
Next I went to live in Alexandra Queenstown – 1hour away from the beautiful Queenstown. It was a modest place but I really hated it there. It was extremely isolated and lonely. I got the barron kind of feeling from the area.

561831_332200546870248_346140265_n 183736_332200526870250_1474821481_n

Finally I travelled to Duneden and Christchurch before making my way back to Auckland and then home. 

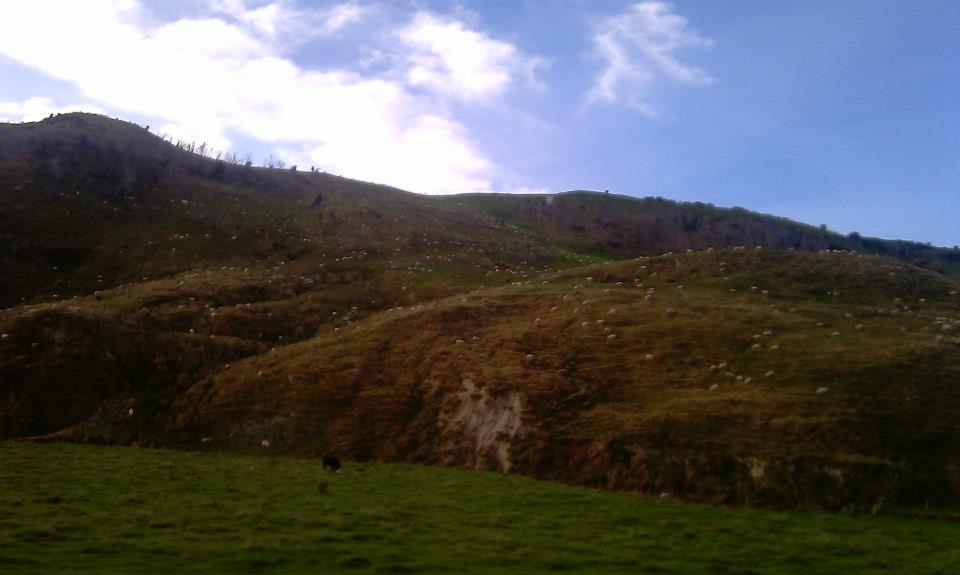
Duneden was lovely, its a more ‘normal’ city to what im used to. Its the students hub for universitys and studying. It was all green here with fields and fields of sheep. Christchurch had just recently been hit by an earthquake and most of the city was going through repairs as it was still quite damaged. So I didnt get many photos of the area. 

546595_332200816870221_541764966_n 420001_332202626870040_2084742303_n 149415_277226192367684_1771140165_n

And that was my experience of New Zealand. A beautiful vast country with mountains of variety! 

0

Life Update


149415_277226192367684_1771140165_n


I thought it was time for a little life update as so much has changed over the past few months. For one I’m no longer living at home, I’m living with my super amazing boyfriend and his wonderful family. I’m loving every single minute of it ! My own family have moved to another county and are set to move country to France now in March 2015. I wish them all the luck in the world despite our differences. I’m now on speaking terms with them after the thunder storm of a year that was 2014. Thank god for little blessings.

At the moment i’m working part-time in a local shop in my teeny tiny town. I’m continuing to search for my ideal career goal, but for now i’m having fun with blogging and I couldn’t be happier.On the makeup artistry front i’m continuing to work professionally, however for me its not the be all and end all of what I want to be successful in. Sure its a crazy fun occupation but to be honest its not enough for me. I want to succeed in numerous avenues and so I’m keeping my eyes peeled for my next big adventure. 

My love life and personal life is great. I adore living with my boyfriend. Hes the best thing that has happened to me and the kindest soul I’ve ever met. Bar his mother of course 😉 My friends are all fabulous as usual and all achieving and succeeding in there chosen avenues. Yay girl power!

I’ve got very into Angel readings and learning about guardian angels in general over the last while. Its so interesting I cant tell you how much I’m loving it. Hopefully it will bring me to some great places in the future. I would love to discover more about it along with energy in crystals as soon as I can. That’s definitely one of my goals for 2015. 

My baby aka my bichon freise is continuing to be the cheeky monkey he always is, no changes there then.

Overall i’m loving life at the minute and this crazy world we live in.

0

New Years Resolutions 

Whether you are a believer in the whole ‘new year,new you ‘ motto, each and every one of us want to improve on our selfs in some way or another during the year. I for one always want to improve myself. It may be in the form of a new skill, a new hairstyle or on myself personally but I’ll always try to achieve this goal. So with all that said my New Years resolution is to stay happy, healthy and grow in confidence. A mammoth task ahead ,especially the healthy bit! No more late night pizza..ahhhh. 


A moment on the lips, a lifetime on those hips !!


I miss saturated fats and artificial sweeteners already.

……mmmm fish and chips…dreaming dreaming.


But in all seriousness goodbye shitty 2014 and hello brand new sparkly clean fresh slatted 2015! 2014 was the worst year I’ve ever had personally but I ended up opening up a brand new future for myself living with my new/real family and enjoying every minute of it. Like they always say you can choose your friends but not your family! I plan on accomplishing my goals through a number of ways. First of the healthy lifestyle, I’ve signed up to a nutrition plan and exercise regim with the body coach over at thebodycoach.co.uk #LeanIn2015 on Instagram. Check him out he’s amazing! Then the confidence will come from myself. I’ve started repeating confidence boosting statements to myself every morning. A favourite of mine is ‘believe and you will achieve’. I also repeatedly tell myself I’m a strong person when times get tough. As for the happy part of my resolution I plan on sticking to the goal of doing at least one thing each week that makes me truly happy and making the most of each day. Trying to see the happy things that occur each day. 

Whether you believe in New Years resolutions or not, a new year opens up the possibility of looking to the future, embracing the positive and forgetting the past. Life’s what you make it. Let’s stop waiting for our life’s to happen, waiting for dreams to come true and holding on to the thoughts of ‘what if?’ . Life is in the now. The only way to creating a successful future is creating a successful you. 


So come on 2015, come at me. This year I promise to make you an amazing one.

0

Intense Smokey Eyes ♥

Good Morning Ladies and Gents,

This post is on gorgeous smoked-out eyes. This look is extremely intense and over-the-top much like would be seen in ‘TOWIE’ or ‘Geordie Shore’. I know many girls out there,including myself are obsessed with this type of make-up at the moment and its seen everywhere on social media!

So for this look I began with the eyes first, I applied foundation to the eyes and underneath the eye area, I then applied powder so that when I applied the eye-shadow it wont move or slide.

I then went in with a nude base eye-shadow. For this I used my fuschia palette, taking a matte cream colour. You can use absolutely and cheap shade for this step.

Next I applied a deep-purple shade to the eye,all-over the lid continuing to add more and more depth of colour until it was prominent and made the eyes pop. I then took my undereye brush and applied this same shade under the lash line.I took this colour lower than I usually would for the illusion of bigger eyes and to draw attention to the eye colour.

I blended this shade out -in the shape of the models eye.

Next I took a matte black shade and repeated the previous steps.For this shade I made sure to leave a halo of the purple shade above the black colour. I continued to apply the black shade adding depth of colour and blending the shade into the lash line. I then took my under eye pencil brush with some of the matte black shade and applied it to my lower lash line, this time the black matte shade was closest to my lashes and I also left a Halo of the purple shade to the bottom lash-line. Again this draws attention to the eye colour.

I applied gel eye-liner to the upper lash line and lower lash line.Using my under-eye pencil while this gel was still wet,I blended the gel out to seal the eyes. I then applied this gel eye-liner to the waterline in one quick swoop to prevent discomfort for the model.

Finally I added lashings of mascara to the bottom and top lashes and then I finished the look by applying Ardell Fake Eyelashes.

10641000_1729343727291452_882754831442824507_n

Above is the finished look 🙂 Hope you enjoyed, don’t forget to like,comment and follow. 

Nicholle-Marie x

0

Burnt Orange Eyes ♥

Hello hello helloo,

Today’s post is on an extremely flattering Winter trend eye-shadow shade -Burnt Orange. For this look I combined a nude base colour (matte) my Inglot shade 383, and a glittery pigmented eye-shadow with hints of yellow gold through it.

  1. I began by taking a matte-nude eye-shadow base from my Fuschia palette. Any shade that is a nude-cream or pale pink/lilac-cream will do. I applied this from my lash line into my brow bone with my sponge-tip eye-shadow brush.
  2. I then began to create a cut crease using my Inglot shade 383(Burnt Orange). I used my flat shader brush for this along with my 110 brush from rebel 66 to blend this shade across and outwards. Instead of using tape on the outside corners of the eyes in this look I used the line of Laura’s natural brow-line to create an almond shape,most flattering to her eyes.
  3. I blended this colour out using my Sigma E40 Brush and then continued to apply the shade all over the lid using my flat shader brush. Again I blended this into the eyes.
  4. For extra depth I repeated these steps once more. This colour is hellllla pigmented so please don’t go all dip happy with this colour. Conjunctivitis isn’t very good looking!
  5. Next I took a yellow pigmented sparkle eye-shadow… I repeat YELLOW. If you use any darker shade with this burnt orange you will loose all effect. It needs to contrast not blend ladies and gents.
  6. Apply this to the inner corners of the eyes and lower lash line. 
  7. Next take an under eye brush-any will do. Apply the burnt orange shade to the lower lash line and blend outwards and inwards towards the inner corner of the eye. Make sure to bring this colour straight across to give the illusion of a longer eye. Its so flattering.
  8. Apply liquid or gel liner to the top lash line. Create a small cat flick following the almond shape of the eye and working toward the brow bone.
  9. Apply gel liner to the inner waterline. If you want extra dark eyes apply a kohl pencil to the tight-line of the eye.
  10. Apply lashings of mascara.
  11. I then applied Ardell lashes – ‘Demi Wispies’ . These are my absolute favourite fake eyelashes for special occasions or going out.

photo (1)

  1. I then started my normal foundation routine, however this look required extra contouring. 
  2. I used a new foundation on this look -Clinique superbalance foundation. Which ill have a review up on as soon as!
  3. Read my post on contouring and highlighting for more info. 🙂
  4. http://blushinbrownies.com/2014/11/11/contouring-like-a-pro/
  5. I finally applied red lip liner and lipstick for gorgeous red lips. Using Seveenteen lipstick and lip liner. Beautiful deep red colour. I highly recommend these products.

1525416_1727726084119883_4821216822040829874_n

This is such a glamorous look,perfect for Christmas and winter as well as any other special event! Thanks for reading and don’t forget to get in touch.

Nicholle-Marie

0

Winter Nails ! ❤️

I’ve been quite busy over the past few days with makeup courses , shopping and work so I haven’t got to post anything up! So here’s a few pictures of winter nails I’ve done recently while I’ve been a busy bee ! They are lovely warm colours for this season ! Completely on trend for Winter 2014 .


IMG_0568


In this first picture above I have used ‘Harmony Gelish’ gel polish, in the shade ‘My forbidden Love’ on every finger bar the ring finger and the shade ‘Welcome to the Masquerade’ on these two fingers left over .


IMG_0704

In the second photo above I have used the shade ‘Tan’ on every finger bar the ring finger and the shade ‘Life of the party’ in the Trends collection on the remaining two fingers by Harmony Gelish .


IMG_0192


In this final photo I have again used ‘My Forbidden Love ‘ all over 🙂

Dont forget to get in touch !

Nicholle-Marie

0

Deep Plum And Caramel Eye ♥

Yesterday I decided to create a makeup look using complimentary colours, that compliment my Green eyes. I decided on Deep Plum eyes with a caramel and vanilla transition. I love these colours together so much and they are so flattering in person! The deep plum colour really makes green eyes pop while the caramel colour gives the eye a smokey look and also helps to take attention away from the deep plum in a way that it’s not to Wow there’s your eyes kind of look.

  1. I began as normal with my foundation routine.
  2. I then applied my primer – this time I used my concealer as a primer (MAC pro longwear concealer) This is great as a primer as it’s quite sticky and heavy, and so it catches pigments beautifully.
  3. I then applied tape to the outer corners of my eyes to catch any fall-out and create a sharp-crisp edge.
  4. To begin I went in with a caramel based colour (this would be more orange/yellow toned than pink). I used my Fuschia palette and choose the nearest colour to caramel ‘CM18’. I buffed this into the eye forwards and back until it was blended in using my Sigme E40 brush.
  5. Next I took an Orange pigmented eye-shadow and applied this to my crease using a shader brush. Then I went in with my blender brush again and blended everything out.
  6. Finally I took a deep plum shade and applied it to the lid using my flat shader brush. This shade I took from my MAC palette although there was no name attached to the shade. A shade similar to it would be ‘3P’ from Fuschia.
  7. I continued to blend all of this out until I was happy with the consistency of the blend.
  8. Next I created a cat flick using my MAC liquid liner.
  9. I then applied eyelashes using ‘Ardell lashes in beauties’.
  10. For my bottom lashes I applied mascara and took my Sigma pencil brush in with the first shade ‘Caramel’,blending it forward and back.
  11. Next I applied that orange shade blending it back and forth with the same brush.
  12. Finally I applied the deep plum shade with a small flat shader brush and blended it just below the waterline into the two previous colours.
  13. To emphasise the colours in this look I highlighted under the eye very heavily to include the flat of the nose and forehead. For this is used ‘Crowne-contouring kit’ and Ben Nye Banana Powder over this highlight.
  14. Finally contour the areas you wish to to include the cheekbones/nose and forehead.
  15. I applied Mac lip-liner in ‘In Synch’ and ‘Faux’ lipstick by Mac on top.

photo 1 (1) photo 2 (1)

And above is the result ! Don’t forget to follow and get in touch !


0

Nail’d It…!

Its Nailzzzz’in  time !

This post is basically going to be ma nails.

Over the summer Ive been busing with nail appointments for ‘Shellac’ and ‘Gel polish’ manicures. Below are just a few of my favourites..

  1. Using Orly Gel Fx in ‘Lola’ I created this pretty in pink look with nail art pens to add to the girlyness of the whole thang

1422491_685336884889944_7265738291547381030_n

2. Using ‘Orly Gel Fx – Gumdrop’ Another lovely pastel, summer colour. Its super bright in real life as well which is so flattering and its such a unique colour.Laaave ❤

10384342_683633075060325_5053150271232132827_n

3. Next is ‘Orly Gel Fx- Seashell and Gelish -June Bride’ This combination is really flattering and dressy. Great for events like a wedding or a graduation. Maybe even a debs if your dress is a similar colour !

16393_716182518472047_9037864312282109419_n

4. This next one is ‘Gelish -TikkiTikiLaranga’ LOVE this colour. Great for summer holidays. This is what I used myself on holidays this year as well as on four other clients . So popular but you can see why,the colour is so vibrant it jumps out of the screen!

10426678_671351599621806_3379259405282919990_n

 After 3 weeks there were no signs of chipping on this clients hand either as seen below. Only regrowth. BENIFITS.

10599466_682141285209504_7609675020189582751_n

Finally here are some of the nude nails I done over the summer using ‘Gelish- Tan’ and ‘Gelish -June Bride’ cobo’s and ‘Gelish – Glitz combos’. Most of the nudes Ive done this year were for Debutantes , who doesnt love a nude nail! I also have some suggestions combinations I done using ‘Gelsih- Sleek White’ and ‘Gelish -Im brighter than you think’along with some nail art I done on clients and myself…

10592839_677930175630615_7123072843757653121_n 10565284_677930148963951_4793471327214898980_n 10603621_675882445835388_1871652451147423624_n 10561582_675881342502165_629476540337786394_n 10552397_665882266835406_4913745170238780950_n 10599567_683632825060350_5250414716987222135_n 10534087_675881135835519_3542573283730751356_n10562970_680755698681396_7609836561490452261_n

This final look I created a few days ago on another client and I really loved it. Its a combination of ‘Orly Gel Fx – Seashell, Lola’ ,’Gelish-June Bride’ and nail art designs which she wanted. Of course I was more than happy to oblige love love love nail art requests! 

10501845_717232505033715_1706535449963322094_n

My next nail post will definitely be involving some Winter colours but for now Im just not ready to let go of the summer pastels ! Cry cry.

Don’t forget to get in touch and share your favourite colours.

Nicholle-Marie