0

Winter Nails ! ❤️

I’ve been quite busy over the past few days with makeup courses , shopping and work so I haven’t got to post anything up! So here’s a few pictures of winter nails I’ve done recently while I’ve been a busy bee ! They are lovely warm colours for this season ! Completely on trend for Winter 2014 .


IMG_0568


In this first picture above I have used ‘Harmony Gelish’ gel polish, in the shade ‘My forbidden Love’ on every finger bar the ring finger and the shade ‘Welcome to the Masquerade’ on these two fingers left over .


IMG_0704

In the second photo above I have used the shade ‘Tan’ on every finger bar the ring finger and the shade ‘Life of the party’ in the Trends collection on the remaining two fingers by Harmony Gelish .


IMG_0192


In this final photo I have again used ‘My Forbidden Love ‘ all over 🙂

Dont forget to get in touch !

Nicholle-Marie

0

Deep Plum And Caramel Eye ♥

Yesterday I decided to create a makeup look using complimentary colours, that compliment my Green eyes. I decided on Deep Plum eyes with a caramel and vanilla transition. I love these colours together so much and they are so flattering in person! The deep plum colour really makes green eyes pop while the caramel colour gives the eye a smokey look and also helps to take attention away from the deep plum in a way that it’s not to Wow there’s your eyes kind of look.

  1. I began as normal with my foundation routine.
  2. I then applied my primer – this time I used my concealer as a primer (MAC pro longwear concealer) This is great as a primer as it’s quite sticky and heavy, and so it catches pigments beautifully.
  3. I then applied tape to the outer corners of my eyes to catch any fall-out and create a sharp-crisp edge.
  4. To begin I went in with a caramel based colour (this would be more orange/yellow toned than pink). I used my Fuschia palette and choose the nearest colour to caramel ‘CM18’. I buffed this into the eye forwards and back until it was blended in using my Sigme E40 brush.
  5. Next I took an Orange pigmented eye-shadow and applied this to my crease using a shader brush. Then I went in with my blender brush again and blended everything out.
  6. Finally I took a deep plum shade and applied it to the lid using my flat shader brush. This shade I took from my MAC palette although there was no name attached to the shade. A shade similar to it would be ‘3P’ from Fuschia.
  7. I continued to blend all of this out until I was happy with the consistency of the blend.
  8. Next I created a cat flick using my MAC liquid liner.
  9. I then applied eyelashes using ‘Ardell lashes in beauties’.
  10. For my bottom lashes I applied mascara and took my Sigma pencil brush in with the first shade ‘Caramel’,blending it forward and back.
  11. Next I applied that orange shade blending it back and forth with the same brush.
  12. Finally I applied the deep plum shade with a small flat shader brush and blended it just below the waterline into the two previous colours.
  13. To emphasise the colours in this look I highlighted under the eye very heavily to include the flat of the nose and forehead. For this is used ‘Crowne-contouring kit’ and Ben Nye Banana Powder over this highlight.
  14. Finally contour the areas you wish to to include the cheekbones/nose and forehead.
  15. I applied Mac lip-liner in ‘In Synch’ and ‘Faux’ lipstick by Mac on top.

photo 1 (1) photo 2 (1)

And above is the result ! Don’t forget to follow and get in touch !


0

Big Bold Sparkly Eyes !

In this post I’ll be talking all about how I emphasise my BIG green eyes. I use this look on a regular basis as it’s my favourite eye makeup and it’s SPARKLY !

For this look I apply my base as I would normally every day an then I start the fun part. Zee eyebawlss.

1. Apply an eye primer all over the lid. For this I used urban decays ‘sin’ as it’s got sparkly pigments throughout and complements shimmery shades beautifully. This primer is my favourite of all time and I’d highly recommend it . But that’s for another day !

2. Now take a matte brown espresso type shade and go in to your crease with it. This will add some definition to your eyes as your going to be using such a light shade all over the lid. Any dark brown will do however I used my MAC dark brown shade in ‘espresso’ . LAVE it :)!

3.now the fun starts. I took my Barry M gold shimmer dust pigments and applied it to the lid using any flat eyeshadow brush . I then blended this all in to the dark shade I use earlier using my sigma e40 blending brush. This is an important step as you don’t want the shadow to look clumpy or make it look like it’s just sitting there screaming hi . Haha
Continue to repeat these two steps, applying the gold pigments and blending to build up the colour to your desired effect.

3. Next go in with eyeliner. In this look I’m using ‘MAC-Feline’ kohl pencil.

4.Finally apply lashings of mascara and /or fake eyelashes. I only applied mascara here as this is my everyday makeup.

IMG_1348.JPG

IMG_1349.JPG

IMG_1344.JPG

Thanks for reading, don’t forget to follow for more updates!

0

Step-By-Step Bronze Smoky Eye

Hey hey hey .
This post is on a Bronze Smoky Cat eye I done recently. I decided to take step by step pictures to show you all how I did this look 🙂

First off I started with an eye primer . For this I used urban decays ‘Eden’ . I applied it all over the lid top and bottom . It’s a lovely primer (very thick) and compliments matte shades very we’ll . I used tape under my eyes to get a perfect cat eye shape. Making sure to get each side the same shape .

Next I took my Fuschia gel eyeliner in ‘chocolate’ . I applied a thin line of this liner above where my natural crease would be . Then I took my sigma eye pencil brush and blended it upwards and outwards towards the tape (this is great because you can make as much mess as you want and when you remove the tape you will have perfect clean cut eye shadow .

IMG_1356.JPG

The next step was a transition colour fading outwards and upwards from the chocolate colour . For this I used Maybelline 24hr stay gel eyeshadow in bronze. I used the same sigma pencil brush and blended the colour upwards making sure not to loose the transition of the colour (big fat smudgy eyes ain’t too good 😛 )

IMG_1357.JPG

Next I took my Fuschia palette and took a dark brown matte shade and applied it to the outer corners of my eyes , using the tape as a guideline makes this step so easy . I then blended this colour into the chocolate liner .

IMG_1359.JPG

IMG_1361.JPG

Next I took a sun kissed bronze shade for the middle part of my eyes and blended it into the dark shade in my outer corners . This look is all about spending the time to blend so window wipe that baby ouuuuut . 🙂

IMG_1363.JPG

I then applied the same Fuschia eyeliner in ‘chocolate’ to my eyes following the tape I applied to the outer corners of my eyes to get a crisp line . If you feel like applying liner to your waterline do this step now , however I love my eyes to be as big so I skipped this step .

IMG_1364.JPG

Finally go ahead and finish this look with eyelashes and your base routine . I used Ardell lashes here ‘beauties’ because I wanted very natural lashes .
This picture is after a night out of dancing and singing so be aware my camera wasn’t in the best of light.


IMG_1376.JPG

Hope you enjoyed , don’t forget to follow for more updates !

0

Nail’d It…!

Its Nailzzzz’in  time !

This post is basically going to be ma nails.

Over the summer Ive been busing with nail appointments for ‘Shellac’ and ‘Gel polish’ manicures. Below are just a few of my favourites..

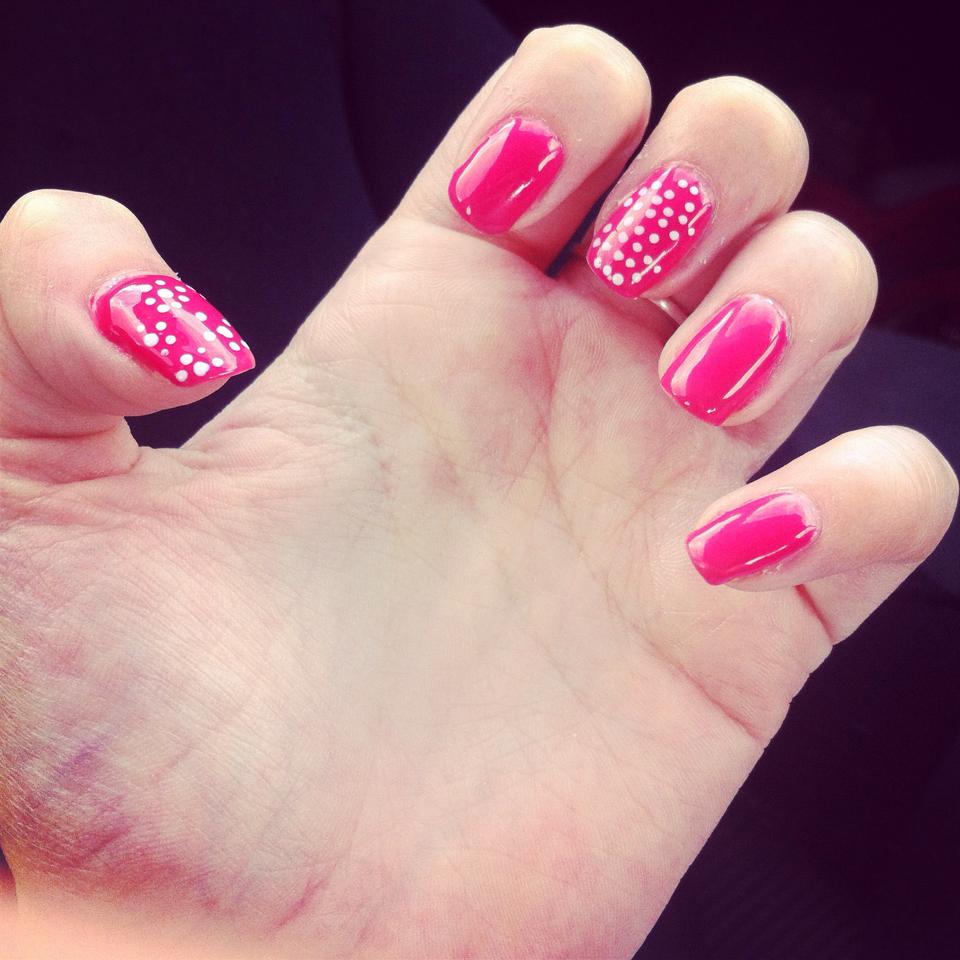
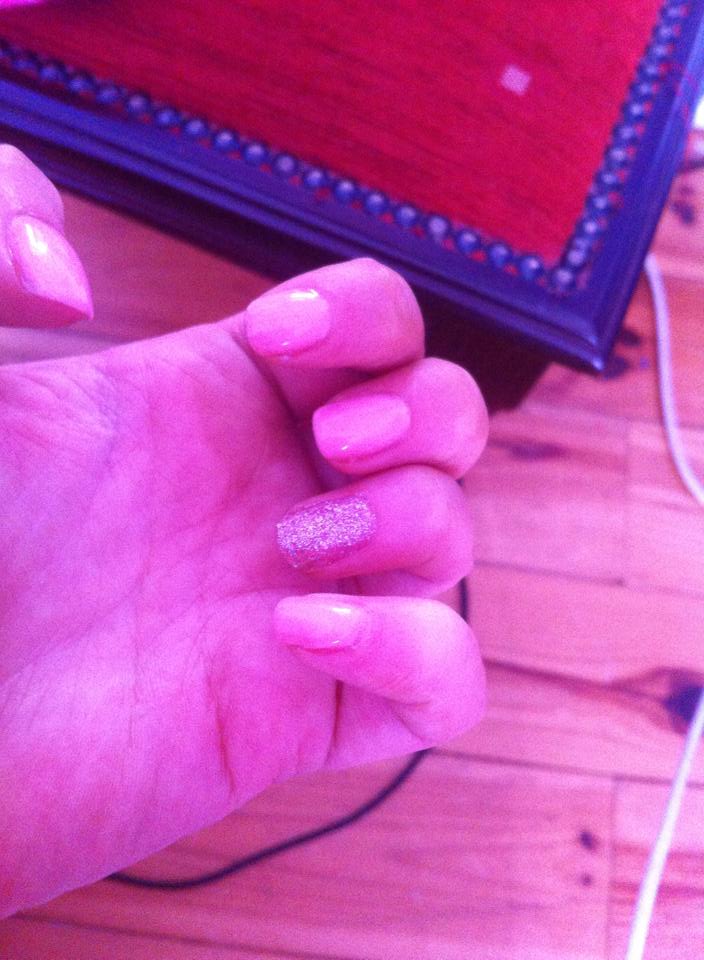
  1. Using Orly Gel Fx in ‘Lola’ I created this pretty in pink look with nail art pens to add to the girlyness of the whole thang

1422491_685336884889944_7265738291547381030_n

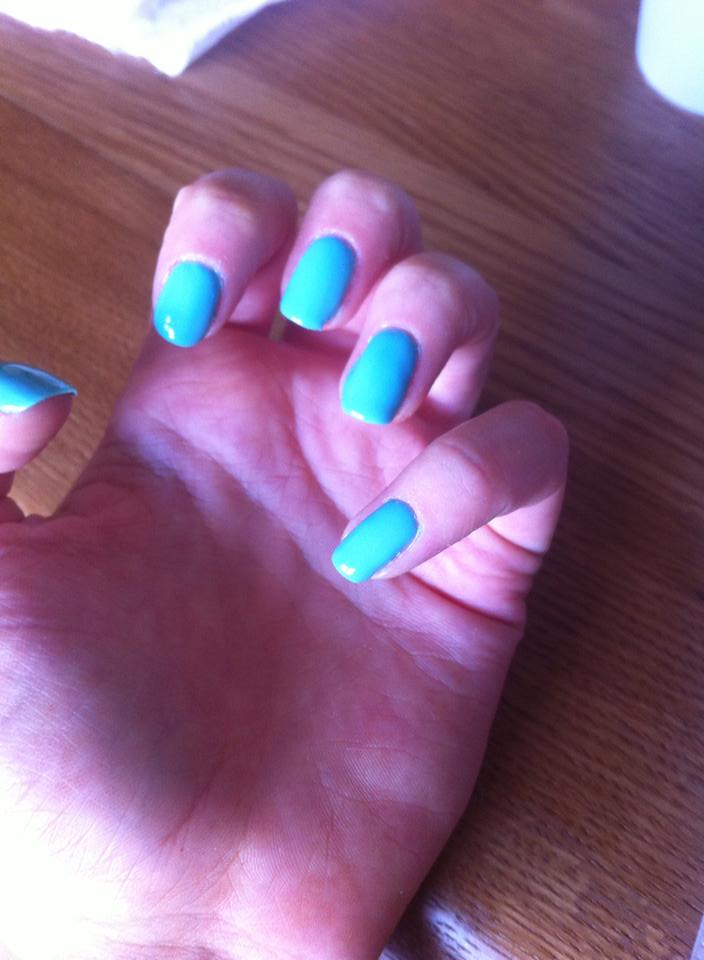
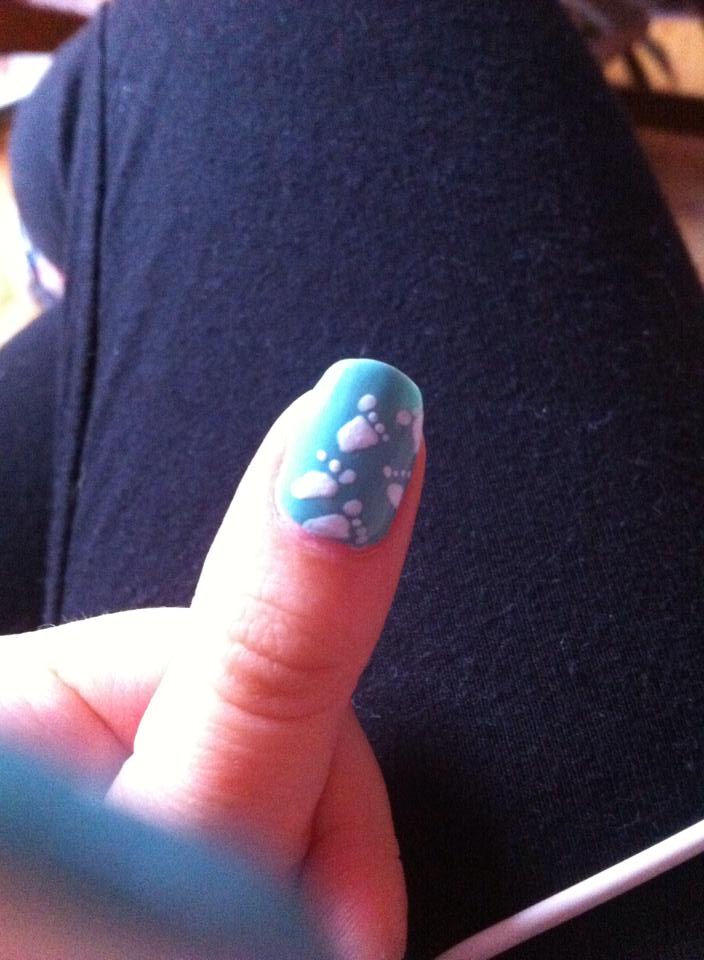
2. Using ‘Orly Gel Fx – Gumdrop’ Another lovely pastel, summer colour. Its super bright in real life as well which is so flattering and its such a unique colour.Laaave ❤

10384342_683633075060325_5053150271232132827_n

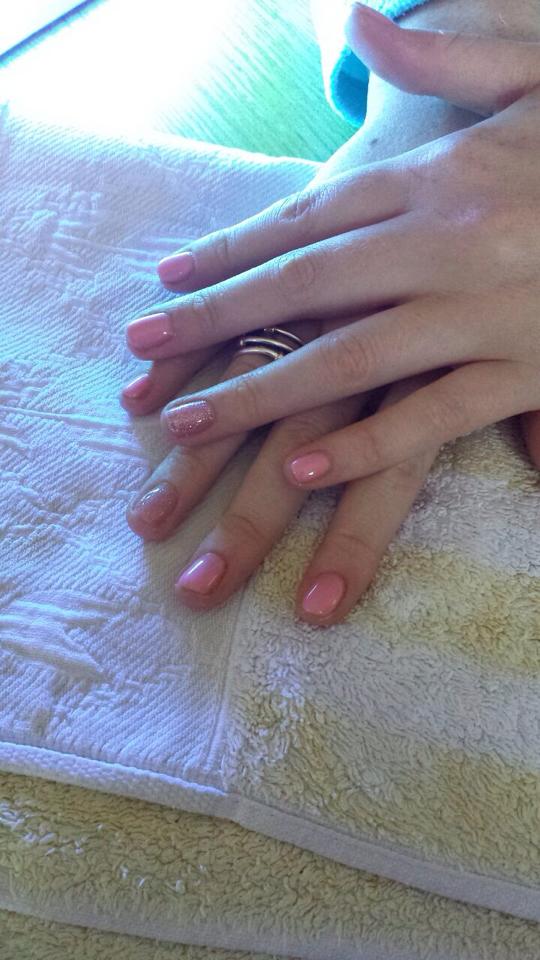
3. Next is ‘Orly Gel Fx- Seashell and Gelish -June Bride’ This combination is really flattering and dressy. Great for events like a wedding or a graduation. Maybe even a debs if your dress is a similar colour !

16393_716182518472047_9037864312282109419_n

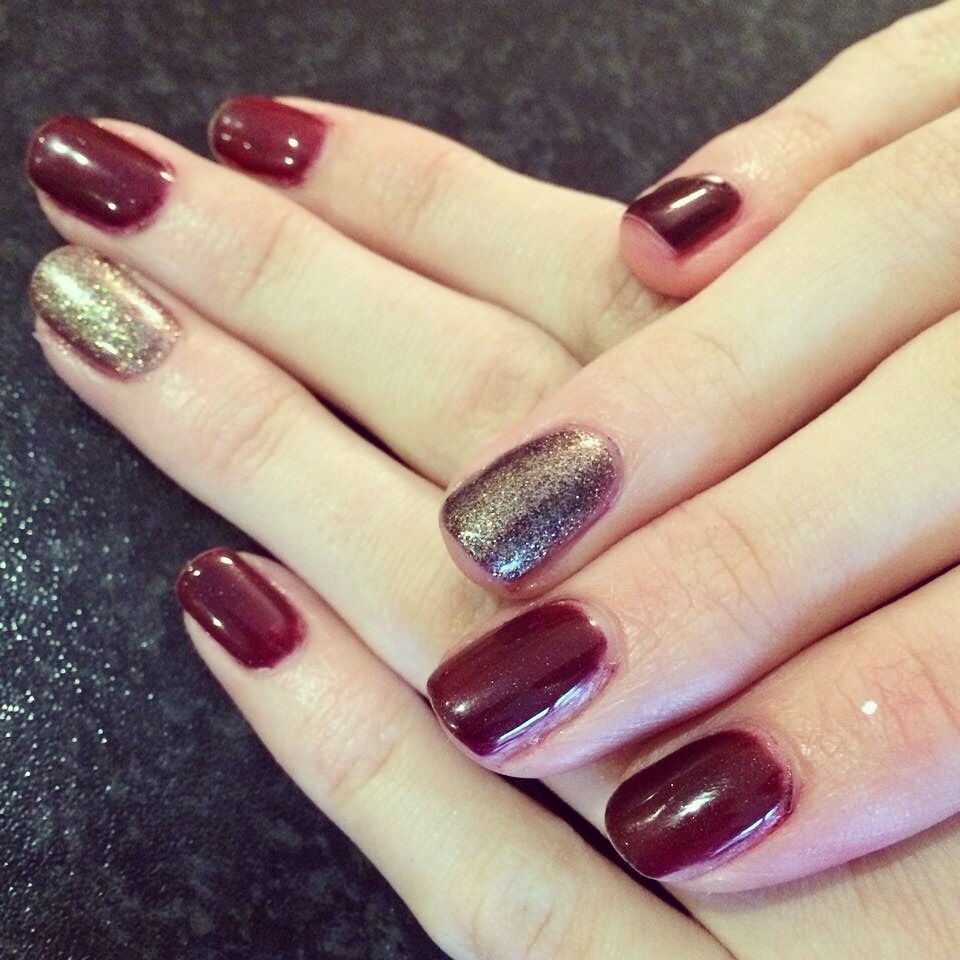
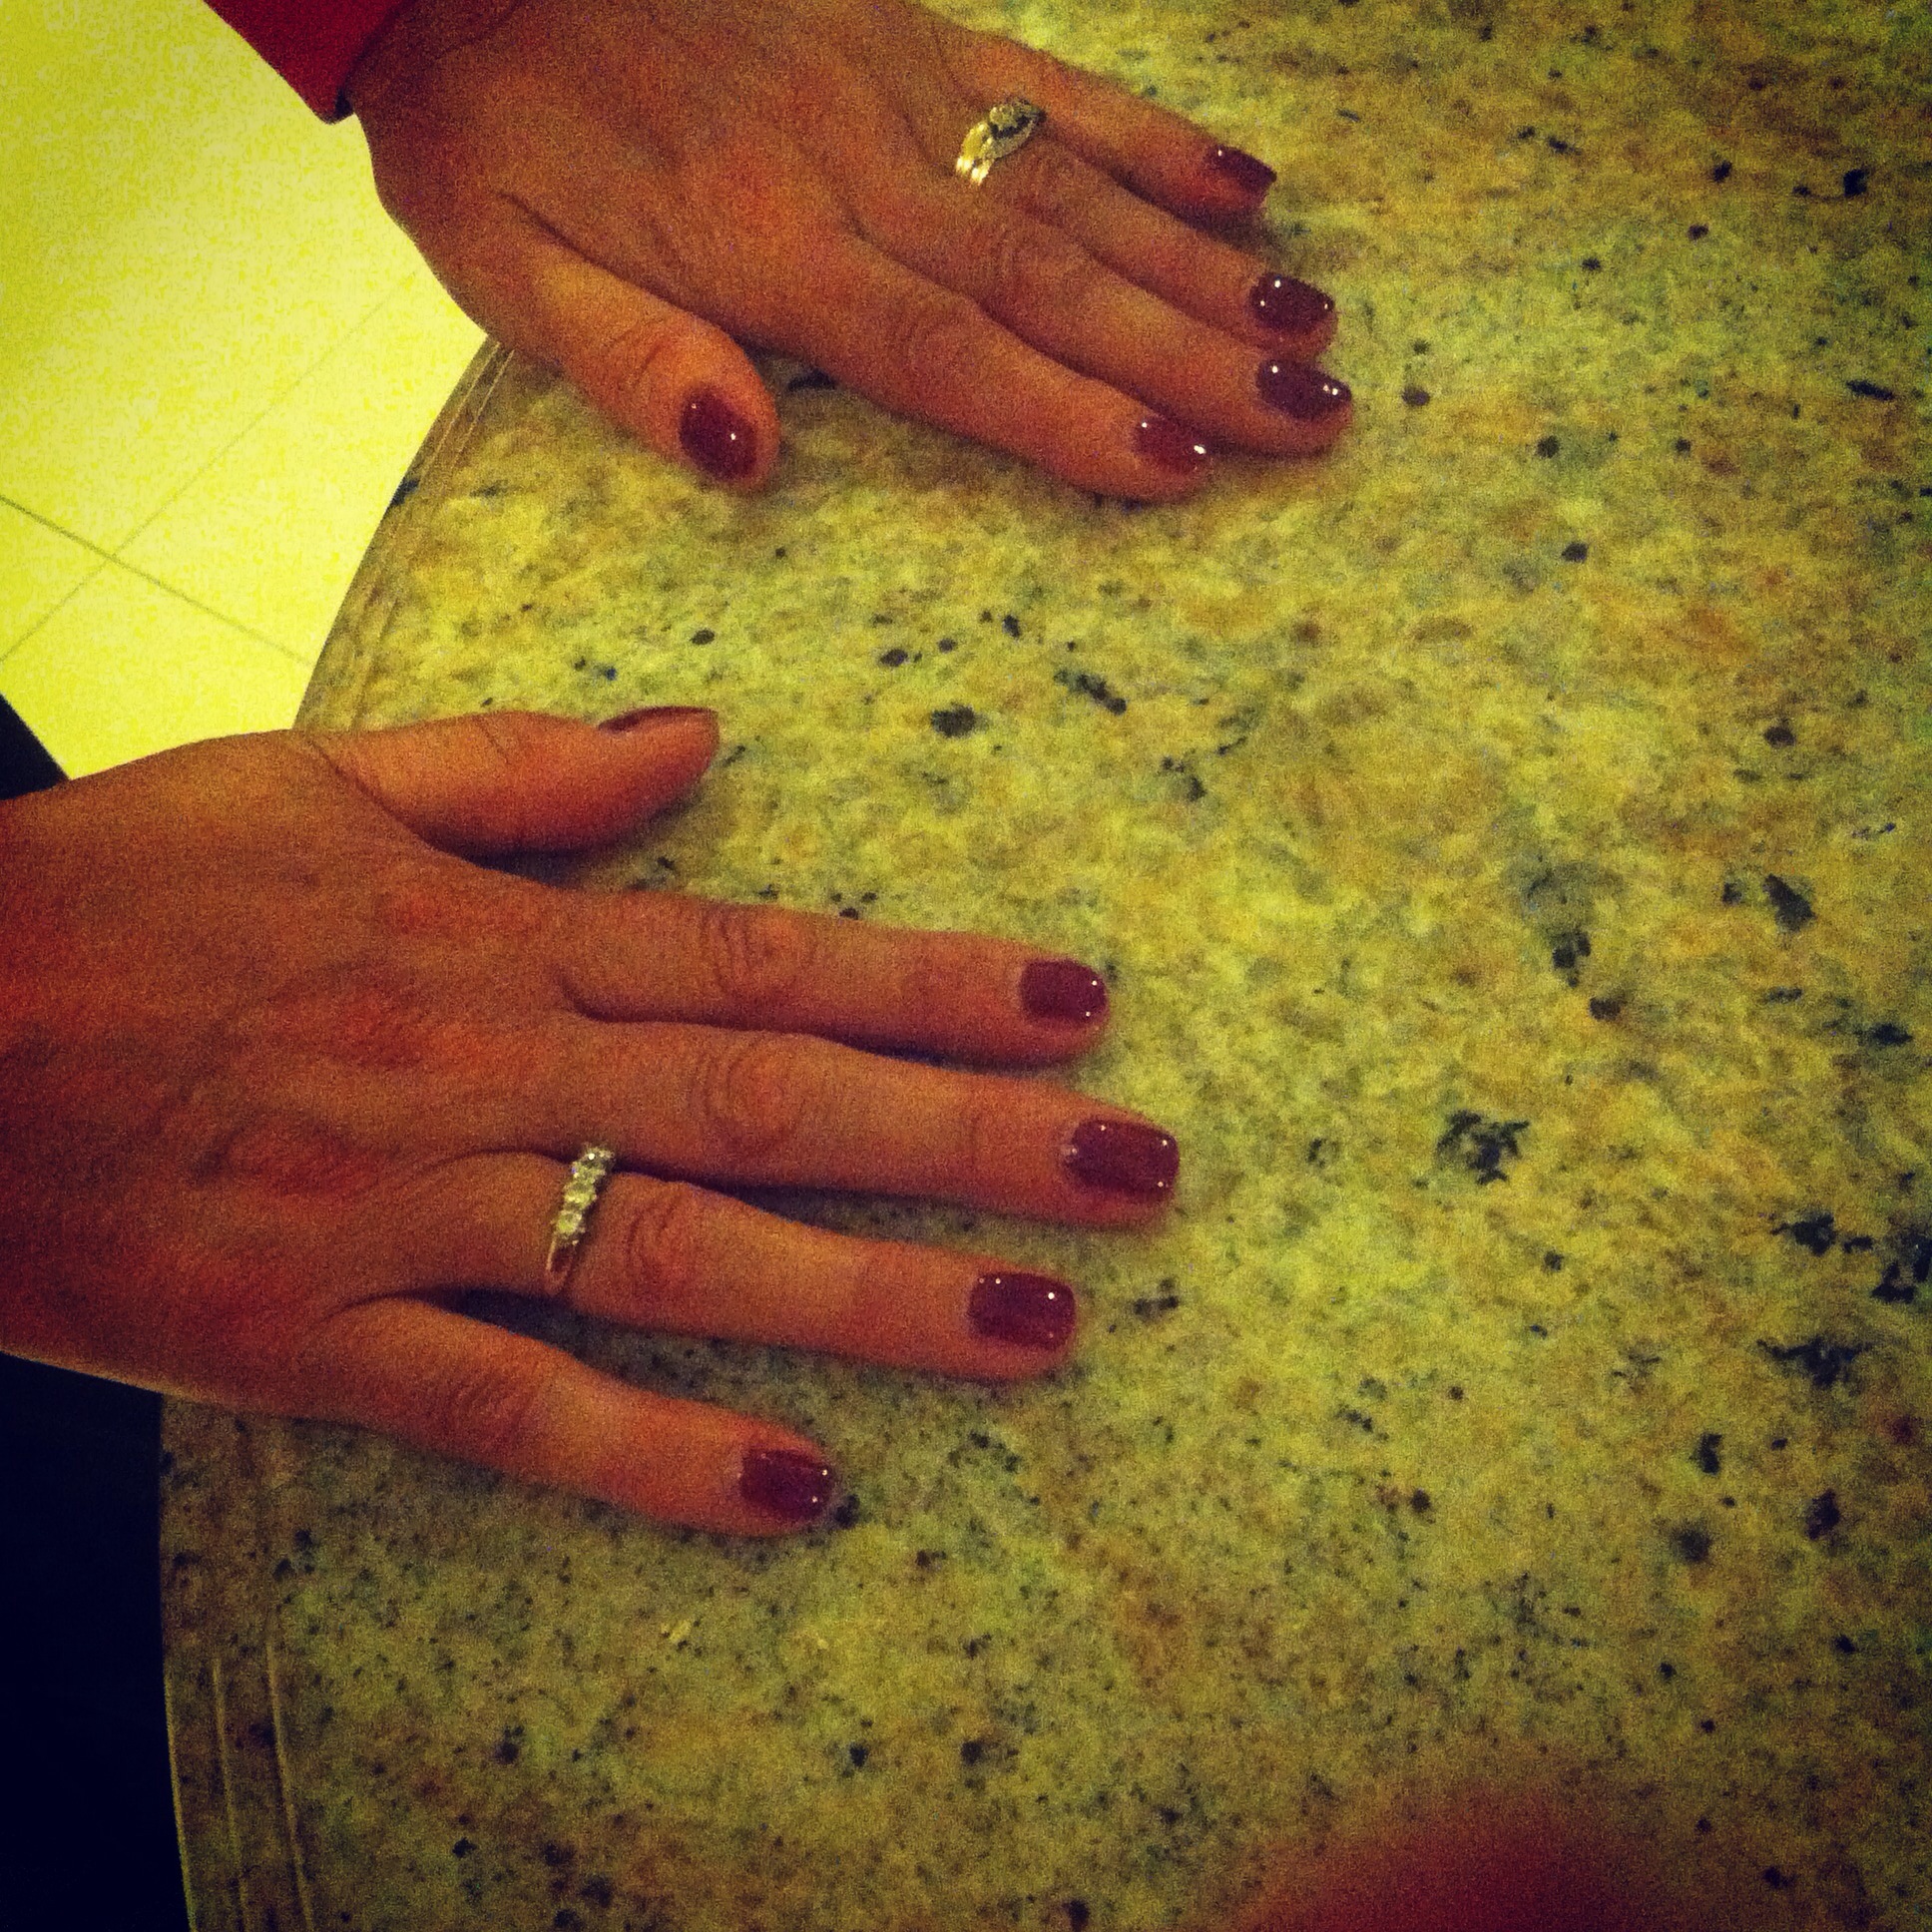
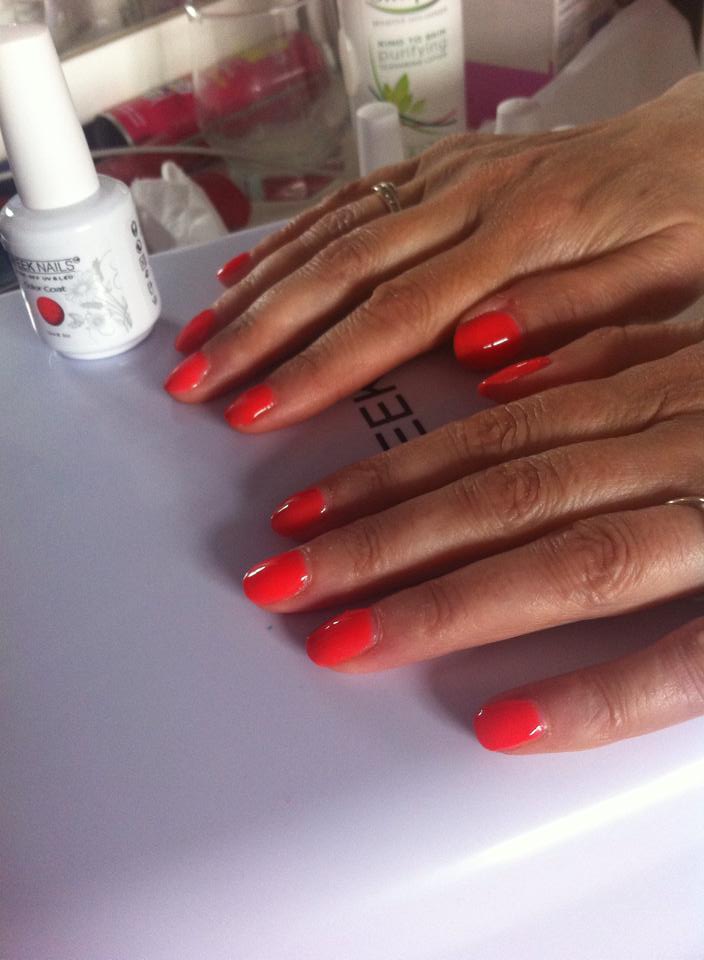
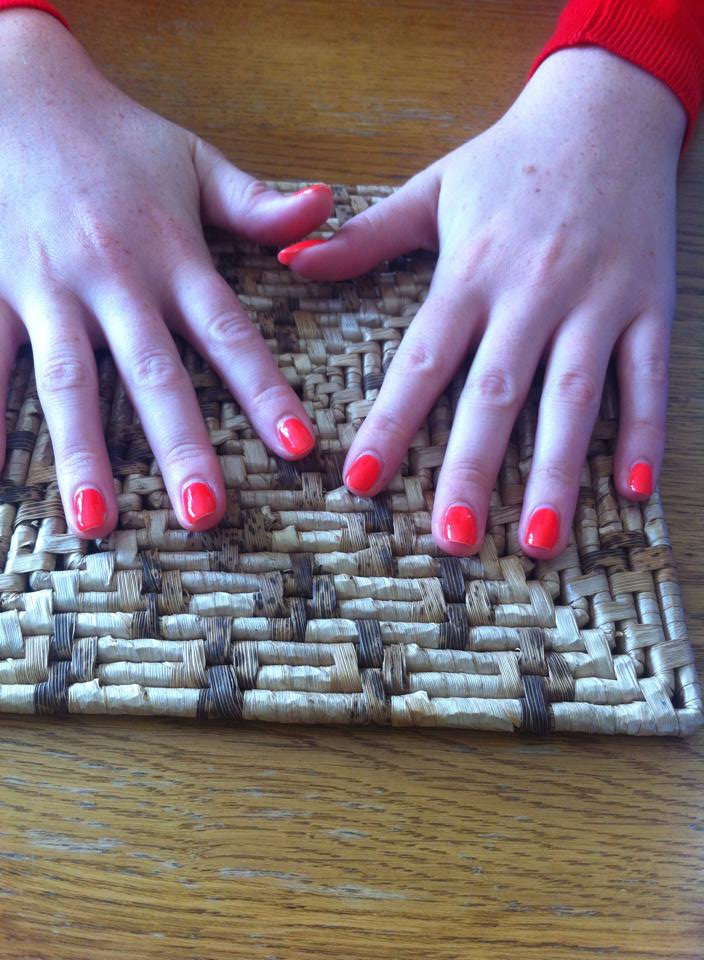
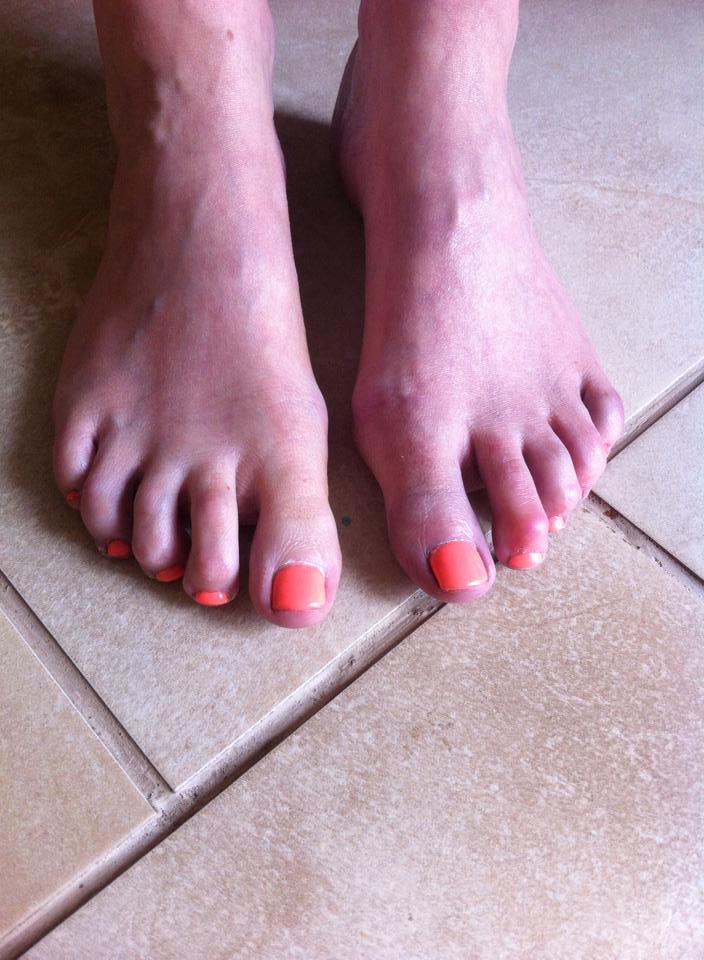
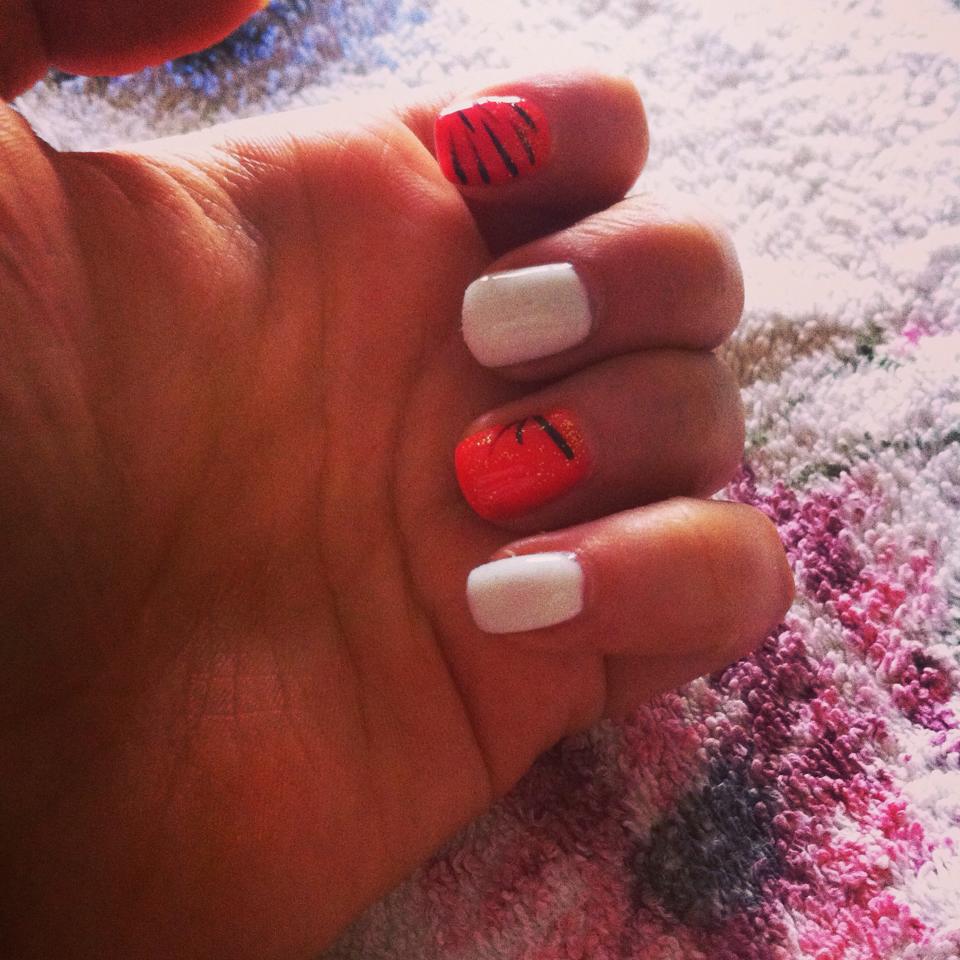
4. This next one is ‘Gelish -TikkiTikiLaranga’ LOVE this colour. Great for summer holidays. This is what I used myself on holidays this year as well as on four other clients . So popular but you can see why,the colour is so vibrant it jumps out of the screen!

10426678_671351599621806_3379259405282919990_n

 After 3 weeks there were no signs of chipping on this clients hand either as seen below. Only regrowth. BENIFITS.

10599466_682141285209504_7609675020189582751_n

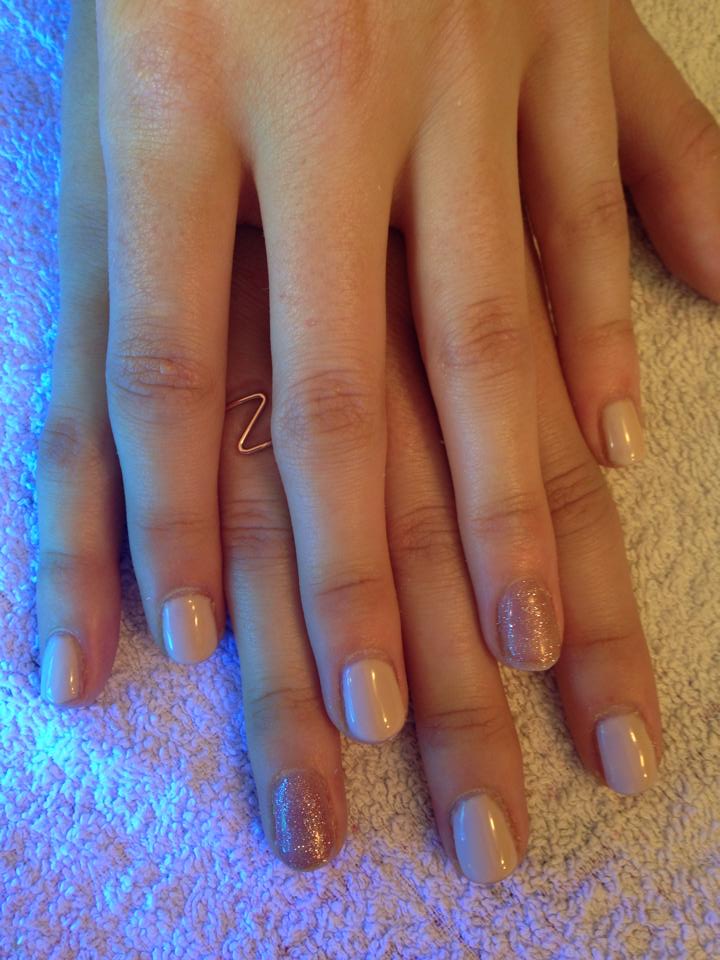
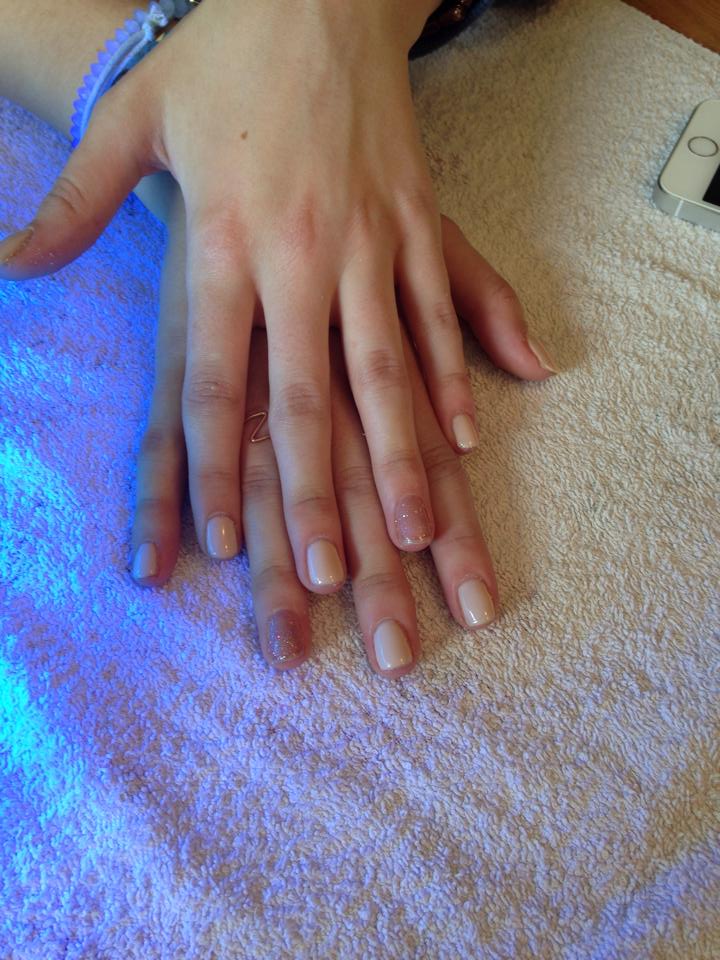
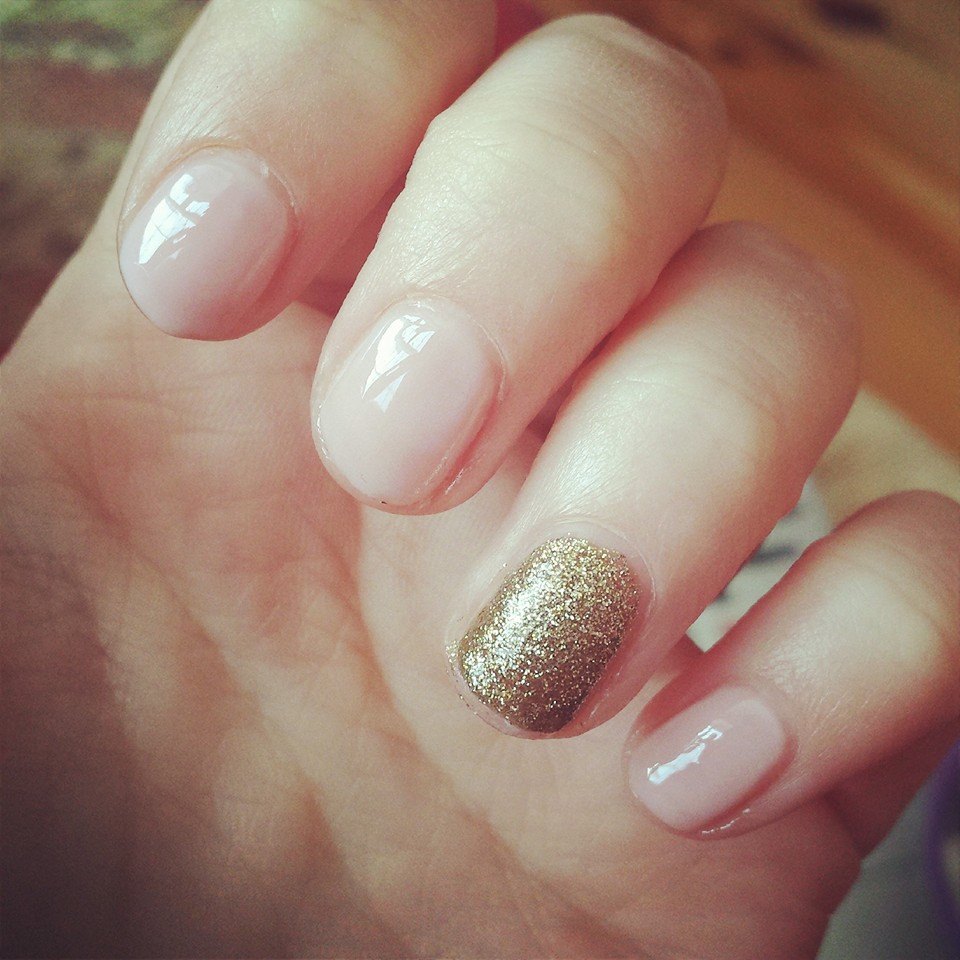
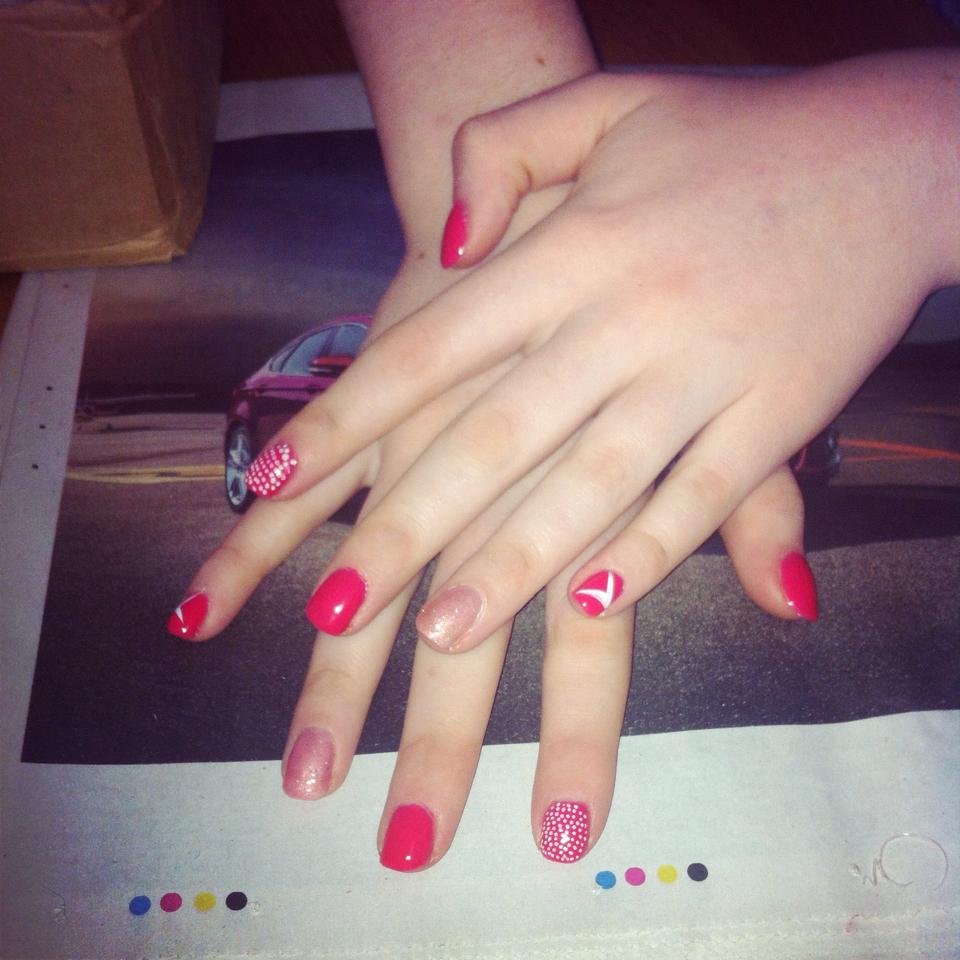
Finally here are some of the nude nails I done over the summer using ‘Gelish- Tan’ and ‘Gelish -June Bride’ cobo’s and ‘Gelish – Glitz combos’. Most of the nudes Ive done this year were for Debutantes , who doesnt love a nude nail! I also have some suggestions combinations I done using ‘Gelsih- Sleek White’ and ‘Gelish -Im brighter than you think’along with some nail art I done on clients and myself…

10592839_677930175630615_7123072843757653121_n 10565284_677930148963951_4793471327214898980_n 10603621_675882445835388_1871652451147423624_n 10561582_675881342502165_629476540337786394_n 10552397_665882266835406_4913745170238780950_n 10599567_683632825060350_5250414716987222135_n 10534087_675881135835519_3542573283730751356_n10562970_680755698681396_7609836561490452261_n

This final look I created a few days ago on another client and I really loved it. Its a combination of ‘Orly Gel Fx – Seashell, Lola’ ,’Gelish-June Bride’ and nail art designs which she wanted. Of course I was more than happy to oblige love love love nail art requests! 

10501845_717232505033715_1706535449963322094_n

My next nail post will definitely be involving some Winter colours but for now Im just not ready to let go of the summer pastels ! Cry cry.

Don’t forget to get in touch and share your favourite colours.

Nicholle-Marie